Dealing with a clogged sink is a frustrating experience that can happen to anyone. Fortunately, there is no need to spend money on expensive plumbing services or tools. In this article, we will give you a fast, quick, easy, and free tip on how to fix a clogged kitchen sink.
And guess what? No chemicals are required! So leave your cup of baking soda and vinegar alone for now.
Here’s a step-by-step guide.
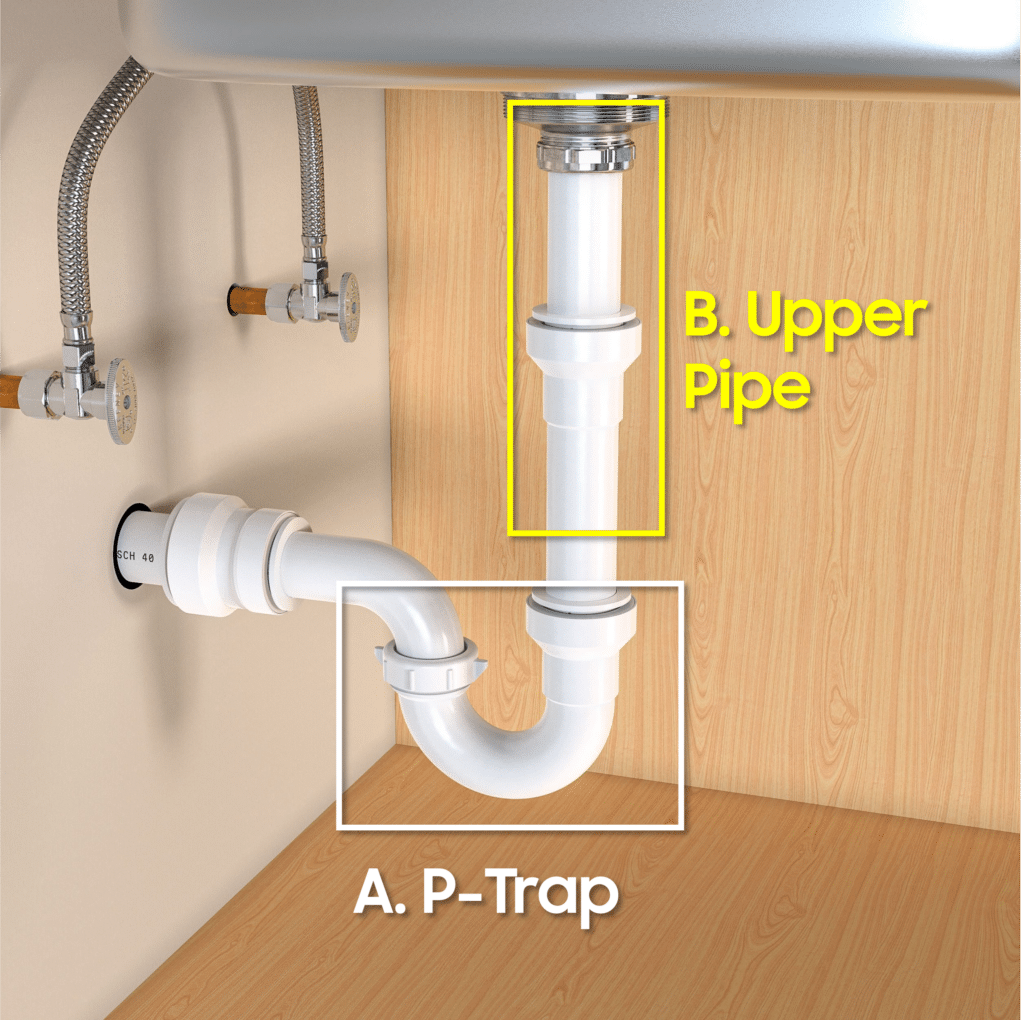
Step 1: Access the P-Trap (A)
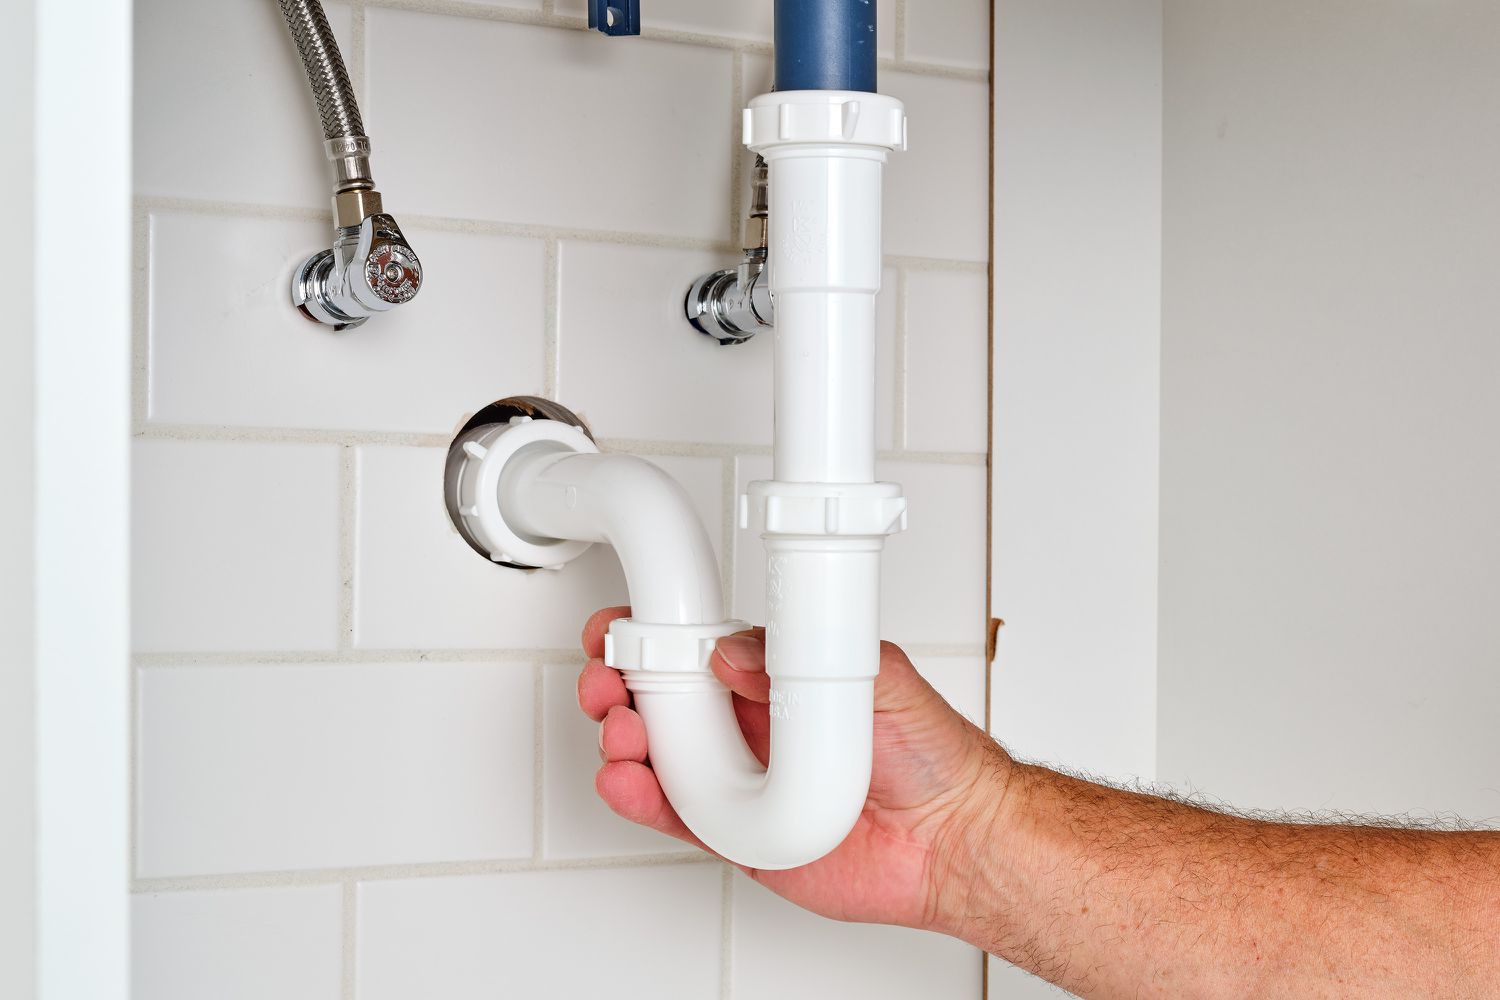
If you don’t know what a P-trap is, it’s that trusty curved pipe under your sink that keeps nasty sewer gasses from infiltrating your home. Almost every type of sink has it, so you can count on it being there to do its job. Just remember to use a flashlight to get a better look at it when it’s time to give it a little TLC.
Step 2: Remove the P-Trap
Next up, it’s time to get hands-on. Grab a trusty bucket and position it strategically underneath the P-trap. This way, you’ll catch any water that flows out when you remove it. Use a wrench (or your hands) to carefully unscrew the nuts holding the P-trap in place. Once you’ve done that, remove the trap from the pipe with the utmost care. Keep in mind that the P-trap is where most clogs tend to hang out, it will have a bit of smell.
Step 3: Clean the P-Trap
Now that you have removed the P-trap, it’s time to give it a good cleaning. Make sure to get rid of any debris, food scraps, hair, or other nasty gunk that might have built up inside the trap. A wire brush or pipe cleaner can come in handy for this task.
Step 4: Remove the Pipe Above the P-Trap (B)
The pipe above the P-trap is where the clog may have accumulated. Remove this pipe and clean it thoroughly.
To remove the pipe above the P-trap, you may need to use a wrench to loosen the nuts that connect it to the trap and the drain. Once the nuts are loose, you can carefully pull the pipe away from the trap and the drain.
Be gentle, as the pipe may be fragile or brittle, especially if it is old or made of PVC material. Once the pipe is removed, you can clean it thoroughly using a newspaper or a similar material to wipe the inside of the pipe clean. You will need to clean the clogged drain as well, as it’s the gate for food and water to pass through.
Keep the bucket underneath them all the time to catch any water or debris that may come out.
Step 5: Reattach the P-Trap
Once you have cleaned the P-trap and the pipe below it, it’s time to reattach the P-trap to the pipe. Before doing so, make sure to install the gasket that comes with it to prevent any leaks. Then, carefully line up the P-trap with the pipe and screw the nuts tightly to secure it in place.
To ensure that your sink is working correctly, pour the water into the sink, keep standing water for about five seconds, and then drain it. Check for any leaks around the P-trap and the pipe below it. If there are no leaks, then congratulations! Your sink should now be draining smoothly.
Tips to prevent your kitchen sink from being clogged
While you can fix a clogged sink with the five simple steps we mentioned above, it’s better to prevent the clogs so you won’t need to get your hands dirty. Here are some good tips you can use:
- Don’t pour grease, oil, or fat down the sink. These substances solidify when they cool and can clog your pipes.
- Use a strainer or a stopper to catch food scraps, hair, and other debris before it goes down the drain.
- Run boiling water down the drain after using it to help dissolve any grease or other substances that may have accumulated in the pipes.
- Install a garbage disposal: By installing a garbage disposal, you can effectively manage food waste in your kitchen sink.
- Drain cleaning: Clean the drain after use to make sure nothing is stuck at the entrace.
Conclusion – How to fix a clogged kitchen sink
It’s all about how to unclog a sink! By following the steps outlined above, you can quickly and easily fix your clogged sink (kitchen sink and bathroom sink, too) without having to spend money on a plumber or expensive tools. At the end of the day, it’s all about understanding your things. Good luck!
