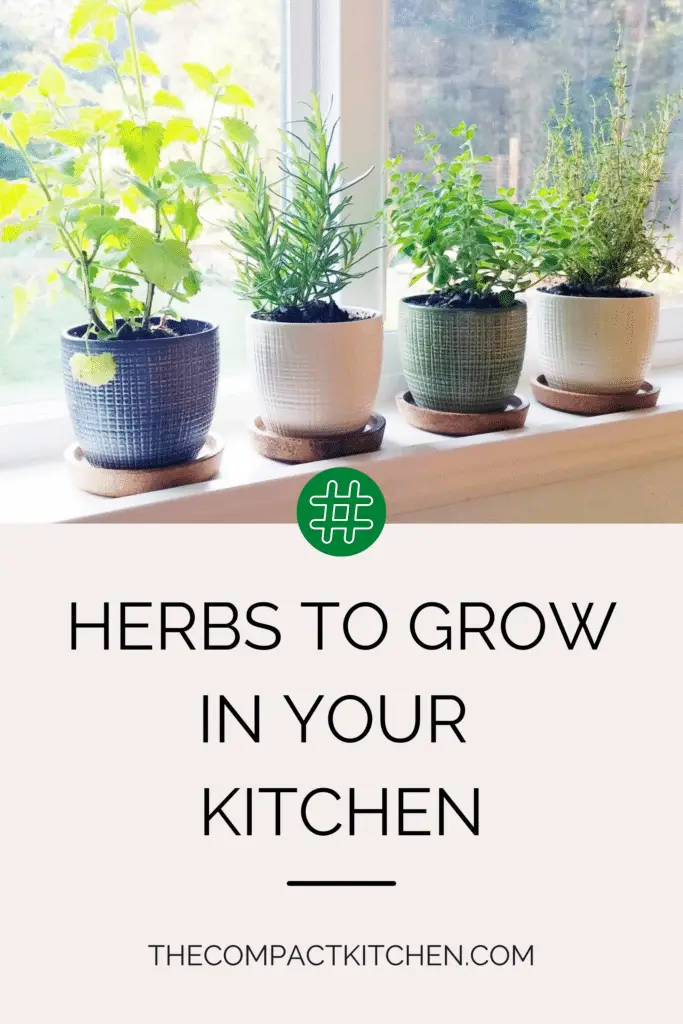

Indoor herb gardening is a delightful way to bring fresh flavors and vibrant greenery into your kitchen. Picture a charming collection of herbs thriving on your kitchen counter, soaking in the nurturing sunlight from your nearby window. It’s a garden-to-table dream, and in this blog post, we’re your guides to making it a reality.
We’ve successfully grown several herbs on our kitchen windowsill, and we’re excited to share our insights. But first, remember this golden rule: these herbs love sunlight, needing at least three to four hours each day.
Now, let’s explore ten fantastic herbs to grow in your kitchen, whether you’re a seasoned gardener or just starting. Let’s get started by meeting our first herb: Dill.

Dill – The Delicate Thread Herb

Dill, with its delicate and thread-like leaves, is an ideal herb to kickstart your indoor garden. It’s not only visually appealing but also adds a unique flavor to your dishes. Growing dill from seeds is a straightforward process that can yield satisfying results in just one to two weeks.
Growing Dill from Seeds
To start, all you need are some dill seeds, a small pot or container, quality potting soil, and a sunny spot on your kitchen counter. Here’s a step-by-step guide:
Seed Planting: Fill your chosen container with potting soil, leaving about half an inch from the top. Scatter the dill seeds evenly across the soil’s surface, gently pressing them in.
Cover and Water: Sprinkle a thin layer of soil over the seeds to cover them lightly. Water the soil gently until it’s evenly moist but not soggy.
Sunlight: Place the pot in a sunny spot on your kitchen counter, preferably close to the window. Dill craves sunlight, so it’s essential to provide it with at least three to four hours of direct sunlight daily.
Germination: In about one to two weeks, you’ll notice the dill plants emerging from the soil. At first, the leaves might not resemble dill, but don’t worry; dill reclaims its signature fine-threaded appearance after the second set of leaves.
Caring for Your Dill
Once your dill plants are established, here are some tips for keeping them healthy:
Watering: Keep the soil consistently moist but not waterlogged. Dill prefers slightly damp conditions.
Thinning: If your dill plants grow too close together, consider thinning them to allow ample space for each to thrive.
Harvesting: Harvest the dill leaves as needed by snipping them with scissors or your fingers. Dill leaves are thin and resemble fine threads, making them a delightful addition to various dishes.
Culinary Uses: Dill is a versatile herb that pairs wonderfully with dishes like soups, salads, and roasted potatoes. Its unique flavor, reminiscent of a combination of fennel and celery, adds a delightful twist to your meals.
With dill successfully growing on your kitchen counter, you’re well on your way to elevating your culinary adventures. But our herb gardening journey doesn’t stop here; next up is a perennial favorite—Thyme.
Thyme – A Perennial Kitchen Companion

Thyme is a perennial herb that not only enhances your culinary creations but also makes an excellent addition to your indoor herb garden. Its earthy aroma and versatile flavor profile make it a kitchen staple for many chefs. What’s more, thyme is quite hardy and can thrive both indoors and outdoors.
While it’s possible to start thyme from seeds, it’s often easier and more reliable to grow it from cuttings or purchase young thyme plants from a nursery or garden center. Here’s how to get started:
Growing Thyme from Cuttings:
Choose Healthy Cuttings: Select healthy thyme cuttings, each about 4-6 inches long, and ensure they have several leaf nodes (the points where leaves emerge).
Remove Lower Leaves: Strip the leaves from the lower half of each cutting, leaving the upper leaves intact.
Plant Cuttings: Fill a small pot with well-draining potting soil. Insert the thyme cuttings into the soil, burying them about 1-2 inches deep.
Moisten Soil: Water the soil until it’s evenly moist but not saturated.
Sunlight: Place the pot in a sunny spot on your kitchen counter where the thyme can receive at least 3-4 hours of direct sunlight each day.
Caring for Your Thyme:
Thyme is relatively low-maintenance once it’s established. Here are some care tips:
Watering: Allow the soil to dry out slightly between waterings. Thyme prefers slightly drier conditions and can tolerate some neglect.
Pruning: Trim your thyme plant regularly to encourage bushier growth and prevent it from becoming leggy.
Harvesting: You can harvest thyme leaves as needed by snipping the stems with scissors or your fingers. Thyme pairs wonderfully with a variety of dishes, including poultry, soups, and roasted vegetables.
Outdoor Versatility: If you decide to move your thyme outdoors during the warmer months, it can thrive in your garden and continue to provide fresh herbs.
With thyme flourishing on your kitchen counter, you’re well on your way to elevating your culinary creations. Next up is oregano, a flavorful herb that can bring a touch of Mediterranean cuisine to your dishes.
Oregano – Flavorful Mediterranean Magic

Oregano, with its robust and aromatic flavor, is a herb that can transport your taste buds to the sunny Mediterranean. While it may not fare well in cold winters outdoors, growing oregano on your kitchen countertop is a breeze. You can start this flavorful herb from a cutting or from seeds.
Growing Oregano from a Cutting:
Select a Healthy Cutting: Choose a healthy oregano stem, about 4-6 inches in length, and cut it just below a leaf node (where leaves grow from the stem).
Remove Lower Leaves: Remove the leaves from the lower part of the cutting, leaving a clean stem.
Plant the Cutting: Fill a small pot with well-draining potting soil. Insert the oregano cutting into the soil, burying it about 1-2 inches deep.
Moisten the Soil: Water the soil lightly to settle it around the cutting.
Sunlight: Place the pot in a sunny location on your kitchen counter where it can receive at least 3-4 hours of direct sunlight each day.
Growing Oregano from Seeds:
Seed Planting: Fill a small pot or seed tray with potting soil. Sprinkle oregano seeds evenly over the surface, gently pressing them into the soil.
Cover and Water: Add a thin layer of soil to cover the seeds lightly. Water the soil until it’s evenly moist but not soggy.
Sunlight: Like other herbs, oregano loves sunlight. Place your pot or tray in a sunny spot on your kitchen counter.
Caring for Your Oregano:
Here’s how to care for your oregano to ensure it thrives:
Watering: Oregano prefers slightly dry conditions, so allow the soil to dry out slightly between waterings.
Pruning: Regularly trim your oregano to encourage bushier growth and to harvest fresh leaves.
Culinary Uses: Oregano’s bold flavor is a staple in Mediterranean cuisine. Use it to season dishes like pizzas, pasta sauces, and grilled meats, but do so sparingly, as it has a potent taste.
With oregano flourishing on your kitchen counter, you’re well on your way to adding Mediterranean flair to your culinary creations. Up next is sage, a herb that not only withstands cold temperatures but also lends a unique pine and citrusy flavor to your dishes.
Sage – A Resilient Herb with Pine-Citrus Zest

Sage, with its distinctive aroma and flavor, is a versatile herb that can thrive indoors, making it a valuable addition to your kitchen garden. What sets sage apart is its remarkable ability to tolerate chilly temperatures, making it an excellent choice if you live in an area with extreme weather conditions.
Here’s how to successfully cultivate sage on your kitchen counter:
Starting Sage Indoors:
Choosing Sage Plants: Begin with established sage plants from a nursery or garden center. Sage can also be grown from seeds, but it’s often more convenient to start with young plants.
Potting Soil: Use well-draining potting soil and select a medium-sized pot with good drainage holes.
Planting: Transplant your sage plant into the pot, ensuring the soil level matches the plant’s existing soil level.
Watering: Water the soil thoroughly after planting and ensure it remains consistently moist but not waterlogged.
Sunlight: Place your sage pot in a sunny spot on your kitchen counter, preferably near a window. Sage thrives with at least 3-4 hours of direct sunlight daily.
Caring for Your Sage:
Sage is a relatively low-maintenance herb. Here are some care tips:
Pruning: Regularly prune sage to encourage bushy growth and prevent it from becoming leggy. You can harvest sage leaves as you need them by snipping the stems.
Flavor Profile: Sage has a unique pine and citrusy flavor, which pairs exceptionally well with other herbs like thyme and rosemary. It’s a favorite in savory dishes, particularly those involving poultry and stuffing.
Cold Tolerance: Sage can endure temperatures as low as 15 degrees Fahrenheit (-10 degrees Celsius), making it suitable for both indoor and outdoor cultivation in a wide range of climates.
Sage’s distinct flavor and resilience make it a must-have herb for your kitchen. With sage thriving on your kitchen counter, you’re ready to infuse your dishes with its delightful pine and citrusy essence.
Parsley – Adding Brightness and Balance

Parsley, with its vibrant green leaves and fresh, crisp flavor, is a versatile herb that can bring a burst of brightness to your indoor herb garden. Not only does parsley thrive on your kitchen counter, but it’s also remarkably resilient, capable of withstanding temperatures as low as 10 degrees Fahrenheit (-12 degrees Celsius). This makes it a fantastic choice for both indoor and outdoor cultivation.
Let’s explore how to cultivate parsley on your kitchen counter:
Starting Parsley from Seeds:
Seed Planting: Begin by selecting a medium-sized pot or container filled with high-quality potting soil. Sprinkle parsley seeds evenly across the surface of the soil and gently press them in.
Cover and Water: Add a thin layer of soil over the seeds to cover them lightly. Water the soil until it’s evenly moist but not saturated.
Sunlight: Place the pot in a sunny location on your kitchen counter where the parsley can receive at least 3-4 hours of direct sunlight each day.
Germination: In a matter of time, usually one to two weeks, you’ll notice parsley seedlings emerging from the soil. As they grow, they’ll develop the distinctive flat and curly leaves that parsley is known for.
Caring for Your Parsley:
Parsley is a straightforward herb to care for. Here’s how to ensure its healthy growth:
Watering: Keep the soil consistently moist but not waterlogged. Parsley prefers slightly damp conditions.
Harvesting: You can start harvesting parsley leaves as soon as they reach a reasonable size, usually after a few weeks of growth. Trim the outer leaves, leaving the central growth point intact for continuous regrowth.
Versatile Culinary Companion: Parsley is incredibly versatile and pairs well with most dishes, including meats, eggs, potatoes, and a wide variety of vegetables. Its fresh, clean flavor adds balance and vibrancy to your culinary creations.
With parsley thriving on your kitchen counter, you’re all set to elevate your dishes with its bright and balanced essence.
Cilantro – A Global Culinary Favorite

Cilantro, also known as coriander in some parts of the world, is a beloved herb renowned for its fresh, zesty flavor. It’s a key ingredient in a wide array of global cuisines, from Indian and Mexican to Thai and Middle Eastern. The best part? You can cultivate cilantro right on your kitchen counter, providing a constant supply of this aromatic herb.
Here’s how to get started with growing cilantro from seeds:
Planting Cilantro Seeds:
Pot and Soil: Choose a pot or container with good drainage and fill it with well-draining potting soil.
Seed Preparation: Cilantro seeds can be a bit tricky to germinate. To help speed up the process, try splitting the seeds in half gently with your fingers before planting. This encourages quicker germination.
Seed Planting: Sprinkle the prepared cilantro seeds evenly across the soil’s surface and lightly press them in.
Moisten Soil: Water the soil lightly to settle it around the seeds.
Sunlight: Place the pot in a sunny spot on your kitchen counter. Cilantro appreciates at least 3-4 hours of direct sunlight each day.
Caring for Your Cilantro:
Caring for cilantro involves a few key steps:
Watering: Keep the soil consistently moist, especially during the germination and early growth stages.
Culinary Uses: Cilantro is famous for its unique and vibrant flavor. It’s often used as a garnish, added to salsas, curries, and soups, or sprinkled over tacos and other dishes. Due to its popularity, you’ll find numerous opportunities to incorporate cilantro into your cooking.
Managing Flowering: Cilantro tends to bolt and produce flowers quickly, especially in warmer weather. To prolong its leafy growth, consider planting cilantro in the fall or providing some shade during the hottest parts of the day.
Cilantro may be a fast-grower that rushes to flower, but with the right care and a continuous supply of seeds, you can enjoy this flavorful herb year-round on your kitchen counter. Coming up next is tarragon, a herb known for its robust flavors and extensive use in French cuisine.
Tarragon – A Taste of France on Your Kitchen Counter

Tarragon, with its distinctive anise-like flavor, is a herb that adds a touch of elegance and French sophistication to your dishes. What sets tarragon apart is its remarkable ability to tolerate frost and cold temperatures, making it a superb choice for both outdoor and indoor cultivation.
Here’s how to successfully cultivate tarragon on your kitchen counter:
Growing Tarragon from Plants:
Select Healthy Tarragon: Begin with established tarragon plants, which you can find at nurseries or garden centers. Choose French tarragon (Artemisia dracunculus var. sativa) for its superior culinary flavor.
Pot and Soil: Use well-draining potting soil and select a medium-sized pot with drainage holes.
Planting: Transplant your tarragon plant into the pot, ensuring that the soil level matches the plant’s existing soil level.
Watering: Water the soil thoroughly after planting and maintain consistent moisture. Tarragon enjoys slightly damp conditions.
Sunlight: Place your tarragon pot in a sunny location on your kitchen counter, ensuring it receives at least 3-4 hours of direct sunlight daily.
Caring for Your Tarragon:
Tarragon is a relatively low-maintenance herb. Here are some care tips:
Pruning: Regularly prune tarragon to encourage bushier growth and prevent it from becoming leggy. Harvest leaves as needed by snipping the stems.
Culinary Versatility: Tarragon is a culinary gem used extensively in French cooking. Its anise-like flavor pairs perfectly with dishes like chicken, seafood, and sauces, particularly Béarnaise sauce.
Cold Tolerance: Tarragon can withstand extremely low temperatures, surviving down to negative thirty degrees Fahrenheit (-20 degrees Celsius). This makes it suitable for various climates, including colder regions.
With tarragon thriving on your kitchen counter, you’ll have access to a taste of France right at your fingertips. Its unique flavor will infuse your dishes with a touch of sophistication. Come after this fantastic herb is basil, a herb beloved for its summery aroma and culinary versatility.
Basil – A Taste of Summer Year-Round

Basil, with its delightful fragrance and ability to infuse dishes with the taste of summer, is a must-have herb for your indoor garden. While it’s true that basil flourishes in the warmth of summer, you can cultivate it on your kitchen counter year-round with a bit of care and attention.
Here’s how to get started with growing basil, whether you’re nurturing it through the colder months or bolstering your outdoor crop:
Starting Basil Indoors:
Choose Your Basil: Select the basil variety that suits your preferences, whether it’s sweet basil, Thai basil, or another variety. You can begin with established plants from a nursery or start from seeds.
Pot and Soil: Opt for a pot with good drainage holes and use well-draining potting soil. Basil doesn’t like sitting in waterlogged soil.
Planting: Transplant your basil plant into the pot, ensuring that the soil level matches the plant’s existing soil level.
Watering: Keep the soil consistently moist but not soaked. Basil prefers slightly damp conditions.
Sunlight: Place your basil pot in a sunny spot on your kitchen counter, ideally near a window where it can receive at least 3-4 hours of direct sunlight each day.
Caring for Your Basil:
Basil is a relatively easy herb to care for, but it appreciates some attention:
Pruning: Regularly prune basil to encourage bushier growth and prevent it from flowering too quickly. Snip the leaves as needed for your culinary creations.
Harvest and Use: Basil’s delightful aroma and taste make it a versatile herb. Use it in a wide range of dishes, from pasta and pizzas to salads and sauces. The options are nearly limitless.
Winter Care: Basil is sensitive to cold temperatures. If you’re growing basil indoors during the winter, make sure it’s shielded from drafts and cold windowsills.
Basil’s fresh, summery aroma and culinary flexibility make it a beloved herb in kitchens around the world. With basil thriving on your kitchen counter, you’re well-equipped to infuse your dishes with a taste of summer no matter the season.
Our herb gardening journey isn’t over yet; next up is mint, a refreshing herb that’s perfect for drinks and tea, and it grows like a weed (in a good way).
Mint – A Refreshing Herb for All Seasons

Mint, with its invigorating aroma and fresh flavor, is a delightful herb to have in your indoor garden. It’s a versatile herb that’s perfect for crafting refreshing drinks, infusing teas, or adding a burst of flavor to your culinary creations. The best part? Mint is known for its resilience and can grow vigorously, almost like a weed (but in a good way), as long as you provide the right care.
Here’s how to cultivate mint on your kitchen counter:
Growing Mint from Cuttings or Root Division:
Select Mint Variety: Choose your preferred mint variety, whether it’s spearmint, peppermint, or another type. Mint can be started from cuttings or by dividing established plants.
Pot and Soil: Use a pot with good drainage holes and well-draining potting soil. Mint enjoys slightly damp conditions.
Planting Cuttings: If starting from cuttings, snip a healthy mint stem about 4-6 inches long, removing the lower leaves. Plant the cutting in the soil, burying it about 1-2 inches deep.
Dividing Established Plants: If using an established plant, gently divide it into smaller sections with roots attached. Plant these sections in the pot, spacing them a few inches apart.
Moisten Soil: Water the soil to settle it around the mint cuttings or divisions.
Sunlight: Place the pot in a sunny location on your kitchen counter where the mint can receive at least 3-4 hours of direct sunlight daily.
Caring for Your Mint:
Mint is a herb that requires some attention but rewards you with its vibrant growth and versatile uses:
Watering: Keep the soil consistently moist but not waterlogged. Mint prefers slightly damp conditions and can be thirsty.
Pruning: Mint can become quite bushy. Regularly prune it to encourage a more compact growth habit and to harvest fresh leaves.
Culinary and Beverage Uses: Mint is a culinary gem known for its use in drinks, teas, salads, and desserts. It’s also an excellent garnish.
With mint thriving on your kitchen counter, you’re ready to create refreshing beverages and elevate your culinary creations with its invigorating flavor. Now, let’s move to the final stop – rosemary, a robust and winter-hardy herb that adds a distinctive piney flavor to your dishes.
Rosemary – The Robust and Resilient Herb

Rosemary, with its aromatic, needle-like leaves, is a herb known for its robust flavor and winter-hardiness. It’s a delightful addition to your indoor herb garden, providing a distinctive piney essence to your dishes. While rosemary thrives outdoors in many climates, it can also flourish indoors, making it a versatile herb to have on your kitchen counter.
Here’s how to successfully cultivate rosemary indoors:
Growing Rosemary from Cuttings:
Choose Healthy Cuttings: Begin by selecting a healthy rosemary stem, about 4-6 inches long, with several leaf nodes.
Remove Lower Leaves: Remove the leaves from the lower half of the stem, leaving the upper leaves intact.
Pot and Soil: Use a pot with good drainage holes and well-draining potting soil.
Planting Cuttings: Plant the rosemary cutting in the soil, burying it about 1-2 inches deep.
Moisten Soil: Water the soil to settle it around the cutting.
Sunlight: Place the pot in a sunny spot on your kitchen counter, ensuring the rosemary receives at least 3-4 hours of direct sunlight daily.
Growing Rosemary from Rooted Cuttings:
Rooting Rosemary Cuttings: You can also start with rooted rosemary cuttings, which you can find at a nursery or garden center. Simply transplant the rooted cutting into your chosen pot with well-draining soil.
Caring for Your Rosemary:
Rosemary is a relatively low-maintenance herb, but it appreciates some care:
Watering: Allow the soil to dry out slightly between waterings. Rosemary prefers slightly drier conditions.
Pruning: Regularly prune rosemary to maintain a compact growth habit and encourage fresh growth. Harvest the leaves as needed for your dishes.
Culinary Uses: Rosemary’s robust, pine-like flavor is a favorite in dishes like roasted meats, potatoes, and bread. Its distinctive taste adds depth to your culinary creations.
With rosemary flourishing on your kitchen counter, you’re well-equipped to infuse your dishes with its unique and robust essence. As our herb gardening journey comes to an end, remember that these ten herbs offer not only culinary delights but also a connection to the natural world right in your home. So, roll up your sleeves, nurture your indoor garden, and enjoy the flavorful rewards of your efforts.
Additional Tips and Resources
Your journey into indoor herb gardening has just begun, and there’s always room for growth and improvement. Here are some additional tips and resources to help you on your herb gardening adventure:
Pest Control: Keep an eye out for common indoor herb pests like aphids and spider mites. You can use natural remedies like neem oil or a gentle soap and water solution to keep them at bay.
Fertilizing: Most herbs are not heavy feeders, but they can benefit from occasional feeding. Use a balanced, water-soluble fertilizer diluted to half the recommended strength every 4-6 weeks during the growing season.
Container Selection: Choose pots or containers with proper drainage to prevent waterlogged roots. Make sure they’re the right size for your herbs, allowing enough space for growth.
Harvesting: Harvest your herbs regularly to encourage bushier growth and prevent them from flowering too quickly. Use sharp scissors or shears to snip leaves and stems as needed.
Drying Herbs: If you have an abundance of herbs, consider drying them for future use. Hang them upside down in a dry, dark place, or use a food dehydrator to preserve their flavor.
Companion Planting: Some herbs, like basil and oregano, make excellent companions for other garden plants. Research companion planting to maximize the health and productivity of your garden.
Books and Online Resources: There are plenty of books and websites dedicated to herb gardening, offering valuable insights, recipes, and troubleshooting advice. Explore these resources to expand your knowledge.
My favorite book: The Cook’s Herb Garden: Grow, Harvest, Cook
Experiment and Enjoy: Remember that herb gardening is a delightful blend of science and art. Don’t be afraid to experiment with different varieties, growing methods, and culinary creations. The joy is in the journey.
Seasonal Rotation: Some herbs may thrive better during specific seasons. Consider rotating your herbs based on their growth preferences to maintain a flourishing indoor garden year-round.
By incorporating these tips and tapping into the wealth of herb gardening resources available, you’ll continue to enhance your indoor garden and savor the rewards of homegrown herbs in your cooking.
Conclusion: Herbs to Grow in Your Kitchen
As we wrap up our exploration of indoor herb gardening, your kitchen counter has transformed into a thriving oasis of flavors and scents. Each herb we’ve discussed, from dill to rosemary, contributes its unique essence to your culinary creations.
With a touch of care and a dash of sunlight, you’ve embarked on a journey that connects you to nature’s wonders. Whether you’re a seasoned gardener or just starting, herb gardening brings convenience, freshness, and elegance to your home.
Tending to these herbs is not just a hobby; it’s a path to tastier dishes, enhanced culinary skills, and a deeper appreciation of the natural world. As you enjoy the convenience of your kitchen garden, take a moment to relish the scents, flavors, and beauty it offers.
So, as you nurture your indoor herb garden, remember that you’re sowing the seeds of a greener, more flavorful future. Happy gardening, and may your culinary creations always be infused with the essence of your kitchen counter garden. Bon appétit!
Read more wonderful articles for your kitchen:
- Best wall colors for a small kitchen
- Best Space-Saving Table and Chairs Ideas for a Small Kitchen
- 10 Kitchen Organization Mistakes You’re Probably Making (And How to Fix Them)