Hey there! Ready to upgrade your kitchen with an induction cooktop? Before diving in, it’s essential to understand what induction cooktops are and why proper installation is crucial. In this blog post, we’ll cover pre-installation steps, necessary tools for installation, a step-by-step guide, and post-installation tips. Stay tuned for expert advice on setting up your induction cooktop for maximum efficiency and durability. Let’s get cooking!


Understanding Induction Cooktops
Induction cooktops are a modern and efficient way to cook in your kitchen. Unlike traditional cooktops that use gas or electricity to produce heat, induction cooktops use electromagnetic energy to directly heat pots and pans. This results in quicker cooking times, more precise temperature control, and increased energy efficiency.
One of the key benefits of induction cooktops is their speed. They heat up much faster than traditional cooktops, allowing you to start cooking almost immediately. This can save you a significant amount of time in the kitchen, especially if you have a busy schedule. Additionally, induction cooktops are safer to use because they don’t have open flames or hot coils that can cause burns or fires.
Proper installation is crucial when it comes to induction cooktops. Because they rely on electromagnetic energy to heat cookware, they require a specific setup to function correctly. Improper installation can lead to poor performance, damage to the cooktop, or even safety hazards. That’s why it’s essential to follow recommended guidelines and seek professional installation assistance if needed.
Key Takeaways:
- Induction cooktops use electromagnetic energy for faster, more efficient cooking.
- They are safer than traditional cooktops due to lack of open flames or hot coils.
- Proper installation is crucial for optimal performance and safety.
Pre-installation Steps for Induction Cooktops
When it comes to installing an induction cooktop, it’s essential to start off on the right foot with some crucial pre-installation steps. By taking the time to properly assess your kitchen space, choose the correct size of cooktop, and check the electrical requirements, you can ensure a smooth and successful installation process.
Kitchen Space Assessment
Before you even think about purchasing an induction cooktop, it’s important to assess your kitchen space to determine the best location for installation. Consider factors such as the size of the cooktop, the clearance needed around it for ventilation, and the proximity to electrical outlets. You’ll want to choose a spot that is not only convenient for cooking but also meets safety standards.
Choosing the Correct Size of Cooktop

Once you’ve identified the ideal location for your induction cooktop, it’s time to select the right size. Induction cooktops come in a variety of dimensions, so make sure to measure the space available in your kitchen to ensure a proper fit. Additionally, consider the number of burners you need based on your cooking habits and the size of your household.
Checking Electrical Requirements
One of the most critical pre-installation steps for an induction cooktop is verifying the electrical requirements. Induction cooktops typically require a dedicated circuit with specific voltage and amperage ratings. Make sure to consult the manufacturer’s guidelines or an electrician to ensure that your kitchen has the necessary electrical infrastructure to support the cooktop.

By completing these pre-installation steps, you’ll be well on your way to a successful induction cooktop installation. Taking the time to assess your kitchen space, choose the right size of cooktop, and check the electrical requirements will help to prevent any headaches down the line and ensure that your new appliance functions safely and efficiently.
Important Tools and Components Needed for Installation
Installing an induction cooktop requires more than just the cooktop itself. You will need a variety of tools and components to ensure a successful and safe installation process. Here is a detailed breakdown of the necessary items you will need:
Safety Gear
First and foremost, safety should always be a priority when installing any electrical appliance. Make sure to wear safety gloves and goggles to protect yourself from any potential hazards during the installation process.
Electrical Components
Since induction cooktops rely on electricity to function, you will need to have the right electrical components on hand. This includes wiring, electrical boxes, and circuit breakers to ensure the proper flow of electricity to the cooktop.
Common Tools

In addition to safety gear and electrical components, you will also need a variety of common tools to complete the installation process. Some of the essential tools include screwdrivers, a tape measure, wire strippers, and pliers. Having these tools on hand will make the installation process much smoother and more efficient.
Additional Materials
Depending on the specific installation requirements of your induction cooktop, you may also need additional materials such as mounting brackets, screws, and heat-resistant sealant. Be sure to carefully read the installation instructions provided by the manufacturer to determine exactly what materials you will need for your specific cooktop model.
Professional Assistance
While it is possible to install an induction cooktop yourself, if you are unsure about any aspect of the installation process or if you encounter any unexpected challenges, it is always best to seek professional assistance. A licensed electrician or appliance installer will have the knowledge and experience to ensure that your induction cooktop is installed correctly and safely.
By gathering the necessary tools and components before starting the installation process, you can help ensure that your induction cooktop is installed properly and functions efficiently for years to come. Remember, safety should always be the top priority when working with electrical appliances, so don’t hesitate to seek professional assistance if needed.
Step-by-Step Guide to Induction Cooktop Installation
Installing an induction cooktop may seem like a daunting task, but with the right guidance, you can easily tackle this project yourself. In this section, we will walk you through the process of installing your induction cooktop step by step. Just follow these instructions, and you’ll be enjoying the benefits of your new cooktop in no time!
Gather Your Tools and Materials
Before you begin the installation process, make sure you have all the necessary tools and components on hand. You will need safety gear such as gloves and safety goggles, electrical components like wire nuts and electrical tape, and common tools like screwdrivers and a tape measure. Having everything ready before you start will make the installation process much smoother.
Shut Off Power and Prepare the Area
Safety should always be your top priority when working with electrical appliances. Before you begin the installation, shut off the power to the area where you will be working. Clear the area around your cooktop and make sure you have enough space to work comfortably. It’s also a good idea to lay down a protective covering to prevent damage to your kitchen counters.
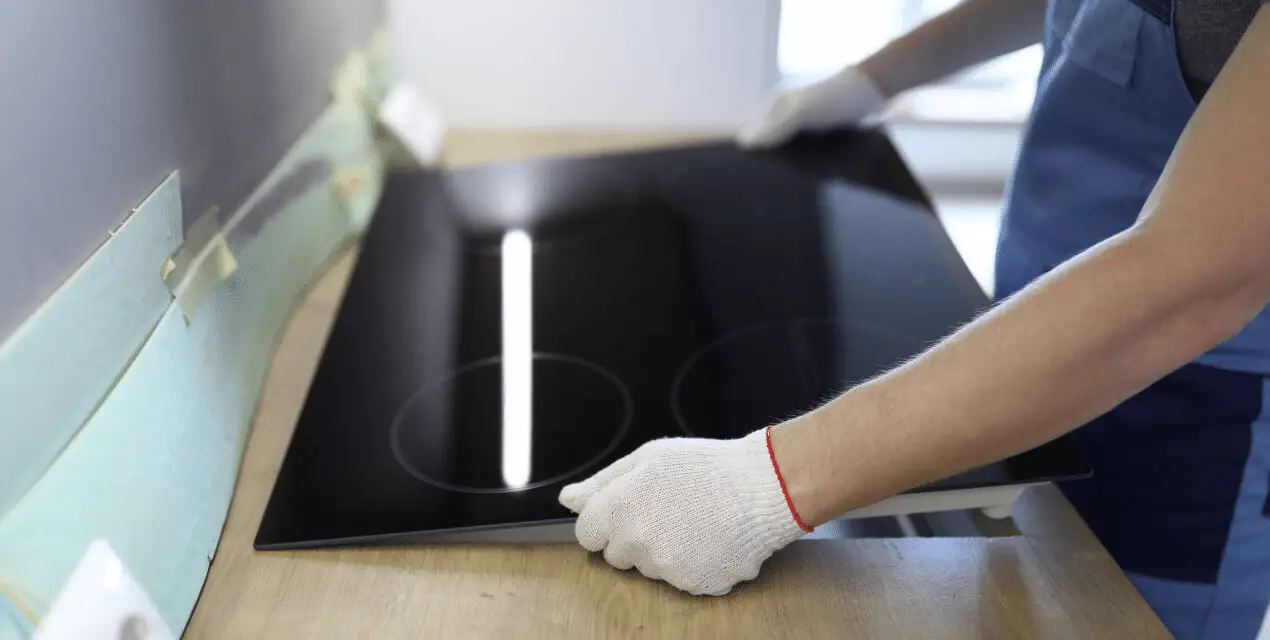
Mount and Secure the Cooktop
Carefully lift the induction cooktop and place it into the cutout on your kitchen counter. Make sure it fits snugly and is level before proceeding. Once you are satisfied with the placement, secure the cooktop in place using the mounting brackets provided in the installation kit. Double-check that the cooktop is secure before moving on to the next step.
Connect the Wiring
Next, it’s time to connect the wiring to your induction cooktop. Follow the manufacturer’s instructions carefully to ensure a proper connection. Use wire nuts to secure the wires in place and cover the connections with electrical tape for added safety. Take your time with this step to avoid any mistakes that could lead to electrical issues down the line.
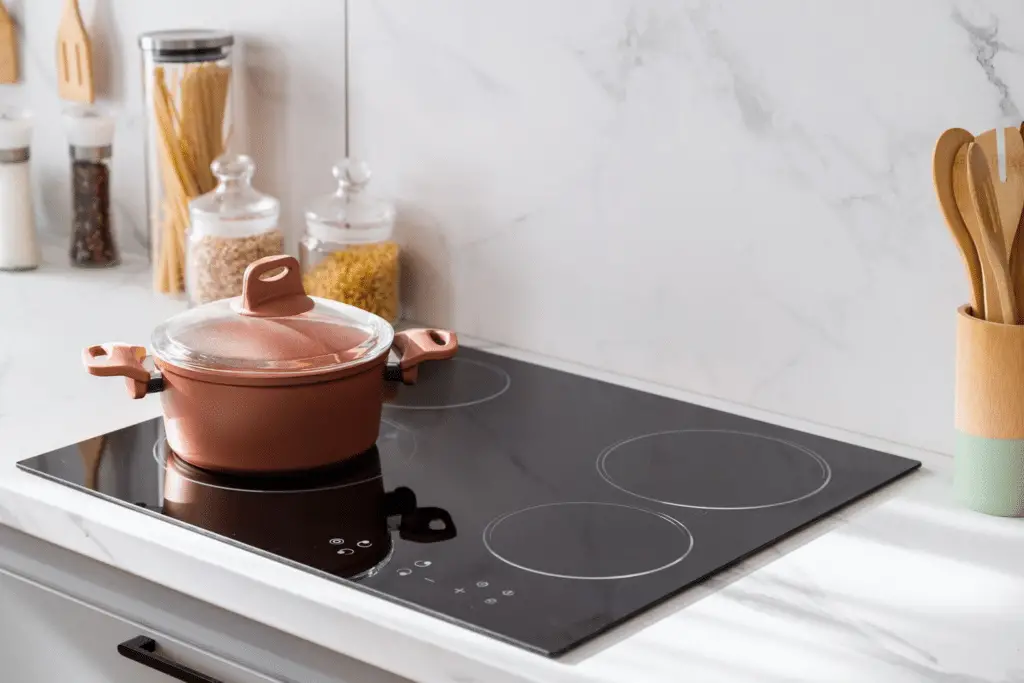
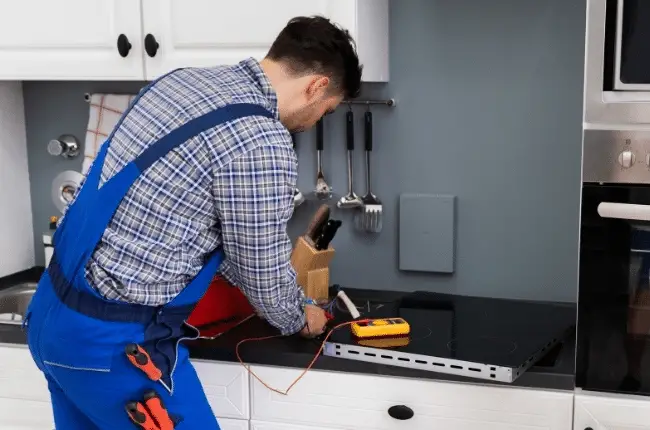
Test the Cooktop
After you have completed the wiring, it’s time to test the cooktop to ensure everything is working correctly. Turn the power back on and test each burner individually to make sure they heat up properly. Check for any error codes or malfunctions that may indicate a problem with the installation. If everything is working as it should, congratulations – you have successfully installed your induction cooktop!
Installing an induction cooktop may seem intimidating, but by following these step-by-step instructions, you can easily complete the process yourself. Remember to take your time, prioritize safety, and double-check your work at each step to ensure a successful installation. With your new cooktop up and running, you can now enjoy the many benefits it offers in your kitchen.
Post-Installation Tips and Maintenance
Now that you have successfully installed your brand-new induction cooktop, it’s important to understand how to properly care for it to ensure its longevity and continued effectiveness. Here are some post-installation tips and maintenance guidelines to keep in mind:
Safely Using Your Induction Cooktop
As you begin using your induction cooktop, remember to always place cookware on the cooking zone before turning it on. This helps prevent any damage to the cooktop surface. Additionally, ensure that the cookware you use is compatible with induction technology by checking if a magnet sticks to the bottom.
When cooking, avoid dragging pots and pans across the surface as this can cause scratches. Instead, lift cookware off the cooktop to move it to a different zone. After cooking, allow the cooktop to cool down before cleaning to prevent burns.
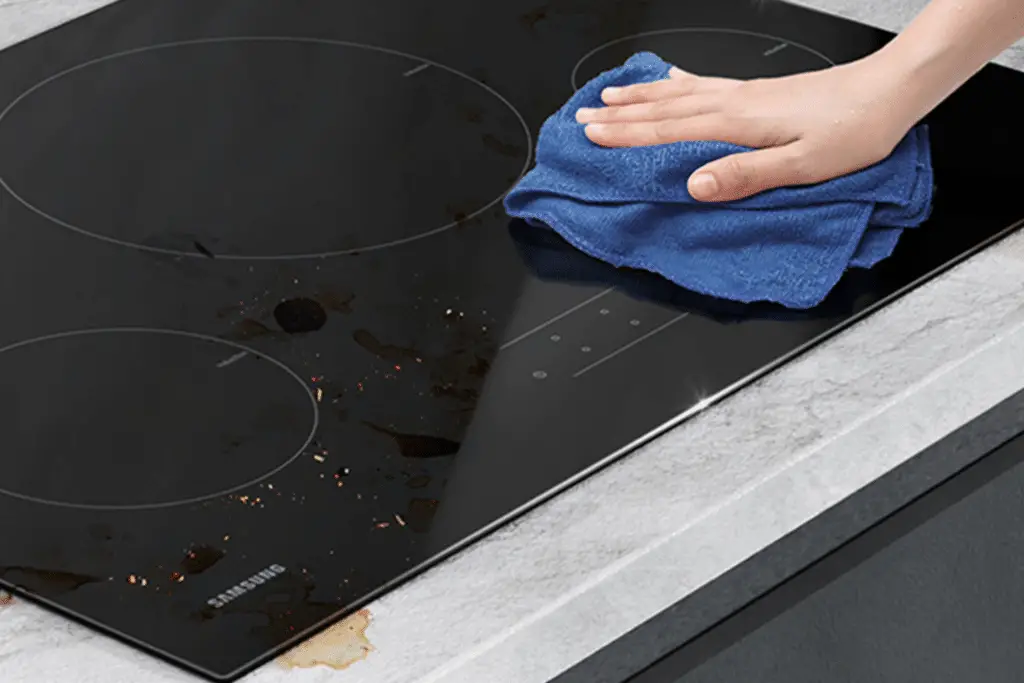
Regular Maintenance Tips
To maintain the sleek appearance of your cooktop, clean it regularly using a soft damp cloth and mild detergent. Avoid using abrasive cleaners or scrubbers as they can scratch the surface. For tough stains, use a ceramic cooktop cleaner recommended by the manufacturer.

Periodically check the cooktop for any signs of damage or wear, such as cracks, chips, or discoloration. Addressing these issues promptly can help prevent further damage and ensure the cooktop continues to function optimally.
When to Seek Professional Assistance
If you encounter any issues with your induction cooktop that you are unable to resolve on your own, it may be time to seek professional assistance. Whether it’s a problem with the wiring, malfunctioning components, or general maintenance, a qualified technician can help diagnose and fix the issue.
Professional installation assistance is also recommended if you are unsure about any aspect of the installation process or if you encounter any difficulties during installation. Hiring a professional ensures that the cooktop is installed correctly and safely, giving you peace of mind.
By following these post-installation tips and maintenance guidelines, you can enjoy the benefits of your induction cooktop for years to come. Remember, proper care and maintenance are key to maximizing the lifespan and performance of your cooktop.
Time to Cook with Style!
Now that you’ve mastered the art of induction cooktop installation, it’s time to whip up your favorite dishes with ease and style. Remember to follow safety precautions, keep your cooktop well-maintained, and enjoy the benefits of efficient cooking. If you ever need help, don’t hesitate to call in the professionals. Happy cooking!